
Digital signatures are used in email to assure the recipient that the sender signed the email message themselves with a unique digital ID and that the content of the email has not been altered in transit.
This article will show how a PIVKey can be set up with a certificate to be used with Microsoft Outlook to sign and send email messages.
Set up the user in the Active Directory Domain Services
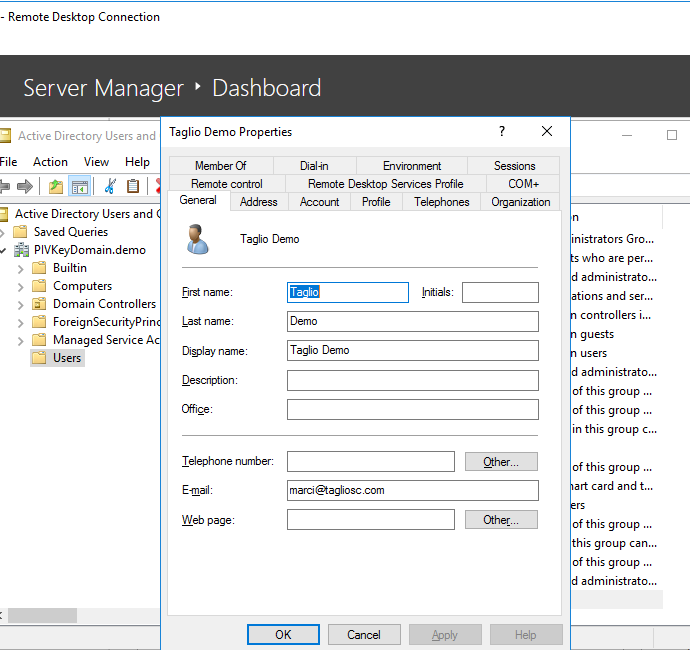
In this example, there is a user set up in the domain called Taglio Demo. To set up and view the user's account on the server, go to the Server Manager and choose Tools, then Active Directory Users and Computers. Add the user, if necessary, by choosing Action, then New, then User. Fill out the required information for name, logon information and password. After creating the user, find the user in the Users folder, Right-click and choose Properties. Under the General tab, the email address needs to match the email address used in Outlook. The user can also be added to any relevant groups at this time.
Next, the certificate template needs to be configured for smart card logon and signature, in the same way we describe in the Windows CA articles. The following information repeats some of that information but note that the template used to enable email signing must be the Smart Card User template rather than the Smart Card Logon template.
Duplicate the Smart Card User template in the Certificate Authority
Go to the Server Manager and choose Tools, then Certification Authority. Expand your Domain name and Right-click the Certificate Templates folder, then choose Manage. Find the Smart Card User template, Right-click it and choose Duplicate Template. Again, the Smart Card User template allows for signature and logon, whereas the Smart Card Logon template is simply for logon, so the user template is required for email signing.
Give the new template a name under the General tab.

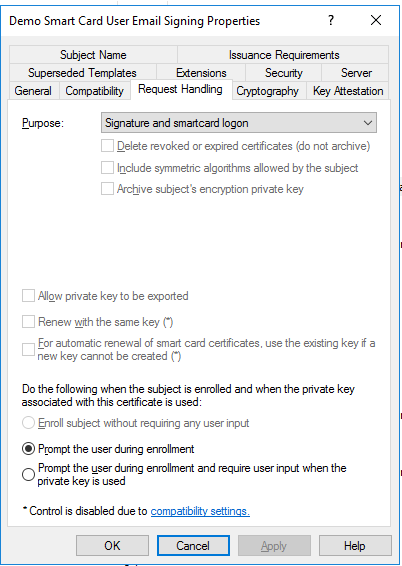
The Compatibility tab should be set to Server 2003. In the Request Handling tab, set the Purpose to Signature and smartcard logon.
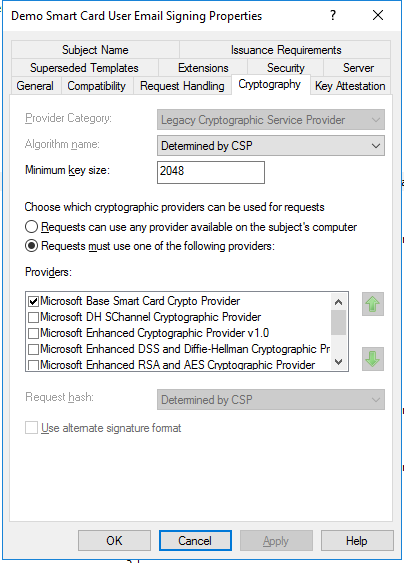
In the Cryptography tab, choose that Requests must use the Microsoft Base Smart Card Crypto Provider.
For this example, the certificate will be mapped using an OID to PIV slot 9A, and the user will be able to logon to Windows with this certificate as well as digitally sign emails with it.
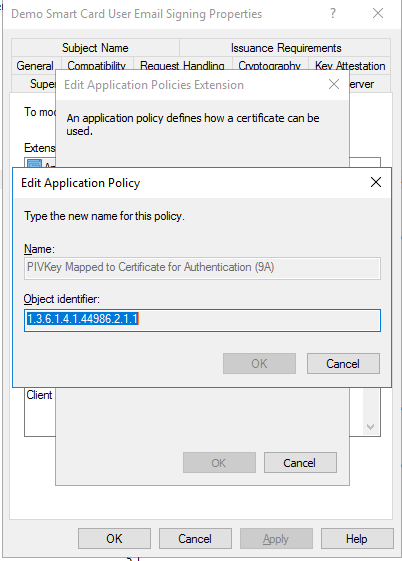
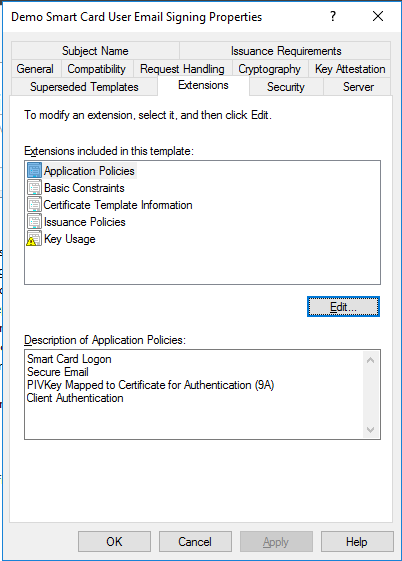
In the Extensions tab, select Application Policies, Edit, then Add. Create a new Application Policy with a unique name and the OID (or Object Identifier) of the PIV slot the certificate will be mapped to. In the example, we named the Application Policy "PIVKey Mapped to Certificate for Authentication (9A)", using the OID for PIV slot 9A, which is 1.3.6.1.4.1.44986.2.1.1. The OID list for the four PIV slots can be found at the end of the Mapping a PIV Certificate using an OID article.
After the new Application Policy with the OID is added, it appears in the Description of Application Policies in the Extensions tab.
In the Security tab, be certain the Enroll option is enabled for the groups and/or users that will be authorized to request and received the certificate.
If an administrator will be requesting the certificate on behalf of another user, in the Issuance Requirements tab, be certain to set the Authorized Signatures to one and choose Certificate Request Agent under Application Policy as outlined in Setting up Certificate Templates to Enroll on behalf of another user.
That is all that needs to be done on the server.
Request the certificate
Log onto the domain from a client computer as the user if the template is set up for self-enrollment or as an administrator if the template is set up for an enrollment agent. Request the certificate in the same way described in the Windows CA articles, using the mmc.
Set up Outlook
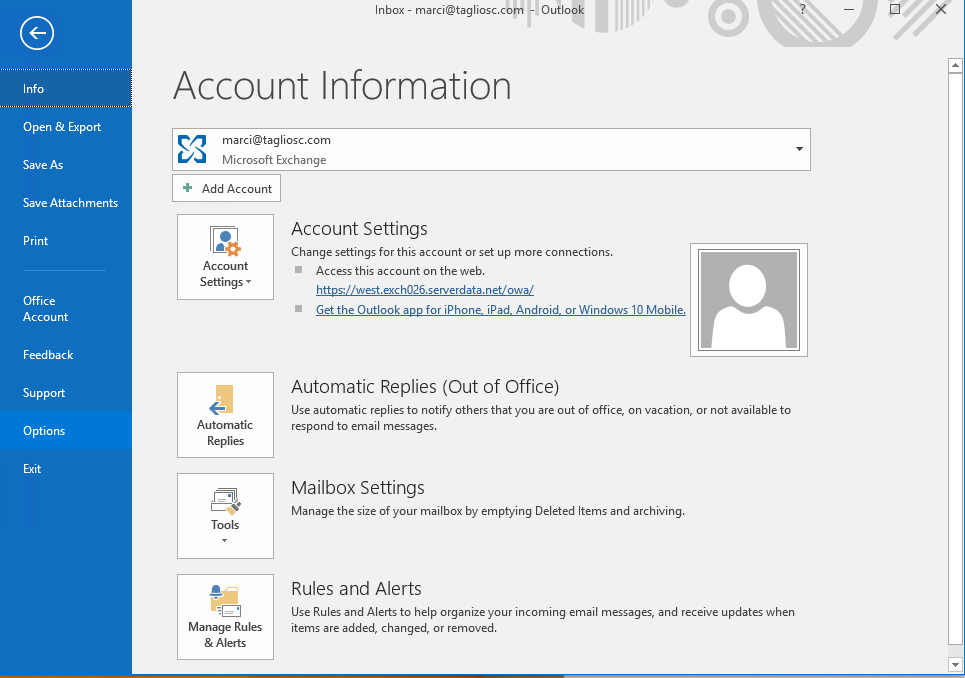
The PIVKey with the new certificate must be connected to the user's computer, via a USB port if it is a token, or a connected smart card reader, if it is a smart card. In the user's Outlook application, choose File, then Options.
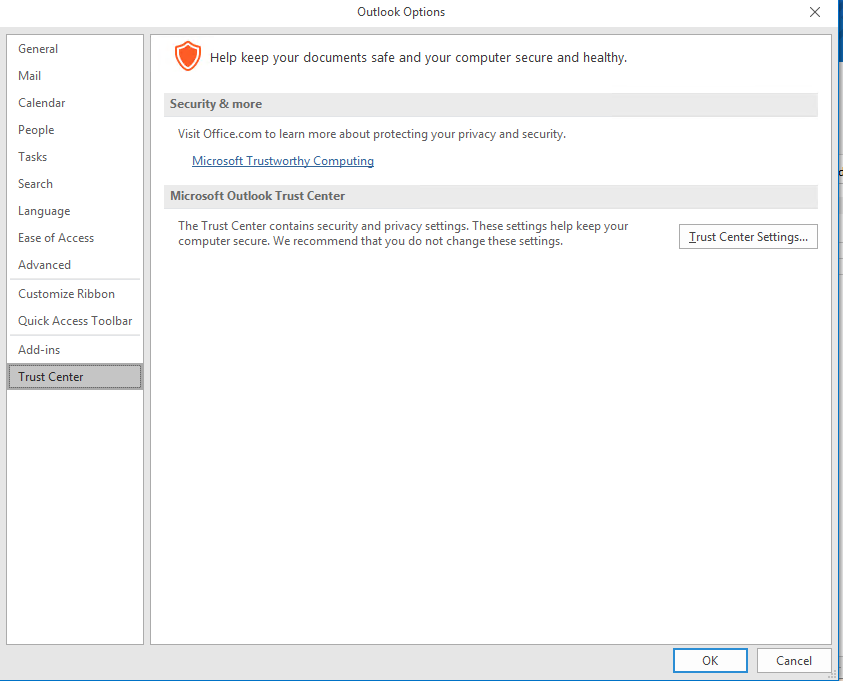
Choose Trust Center, then Trust Center Settings.
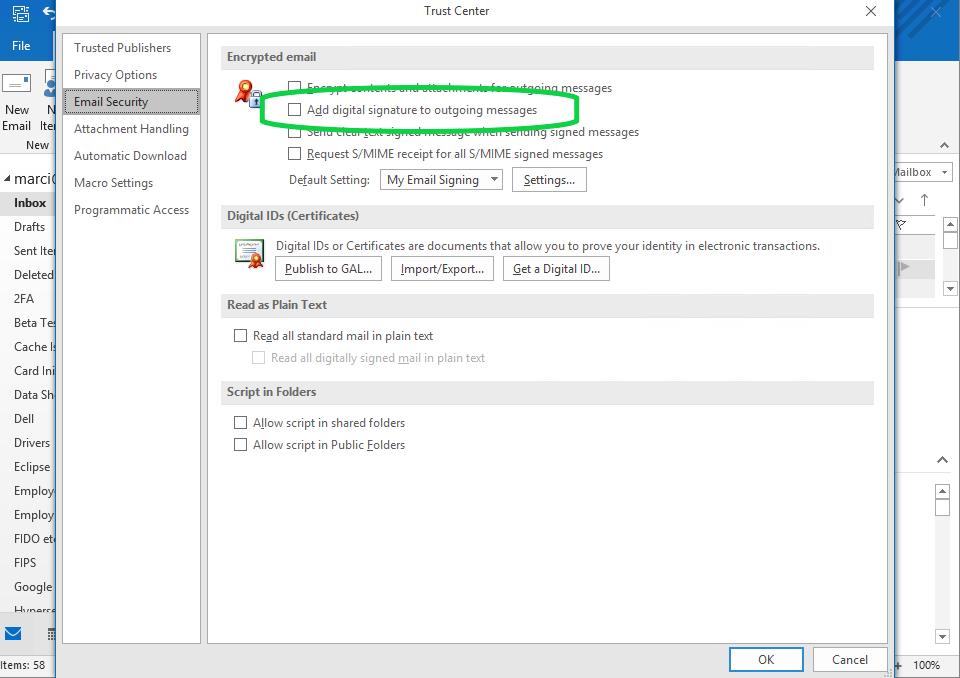
On the left, choose Email Security.

Under Encrypted email, if all email messages should be signed when they are sent, check Add digital signature to outgoing messages. If only some messages are to be signed, leave it unchecked. Then choose Settings.
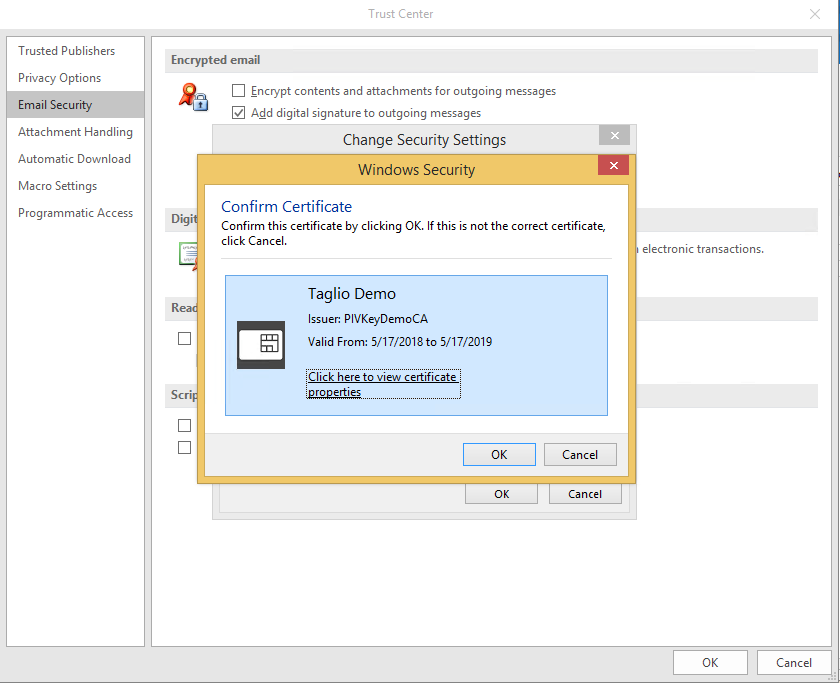
Name the new Security Setting, and select Choose for the Signing Certificate.
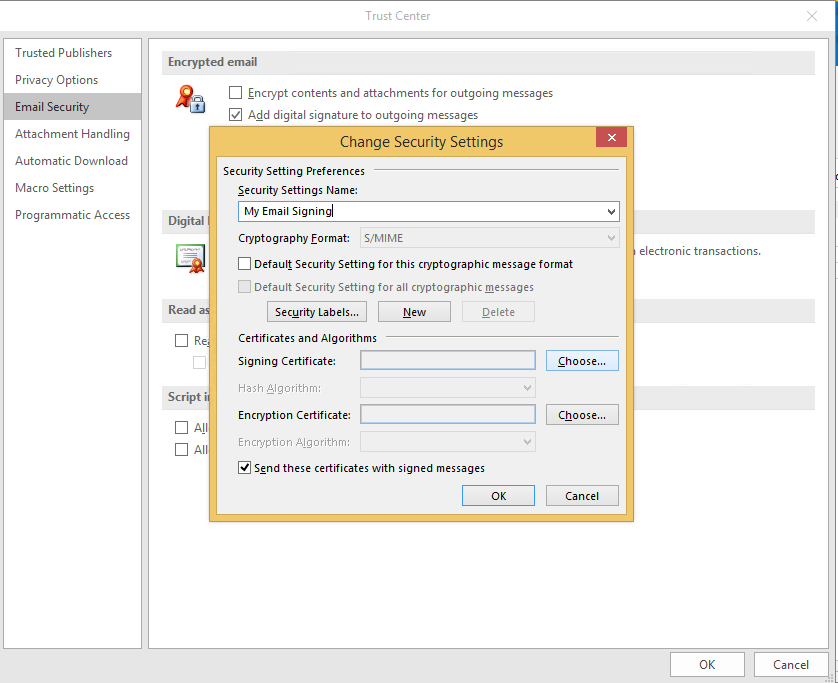
A list of available certificates should be displayed. Choose the user's signing certificate from the list. If the user's signing certificate is not displayed, be certain the PIVKey is inserted and connected correctly, see Testing the Device Connection if needed.
The SHA1 hash algorithm is a bit outdated, a stronger algorithm can be chosen, and then press Ok.

Save all the new options and return to the regular Outlook menu.
Send an email
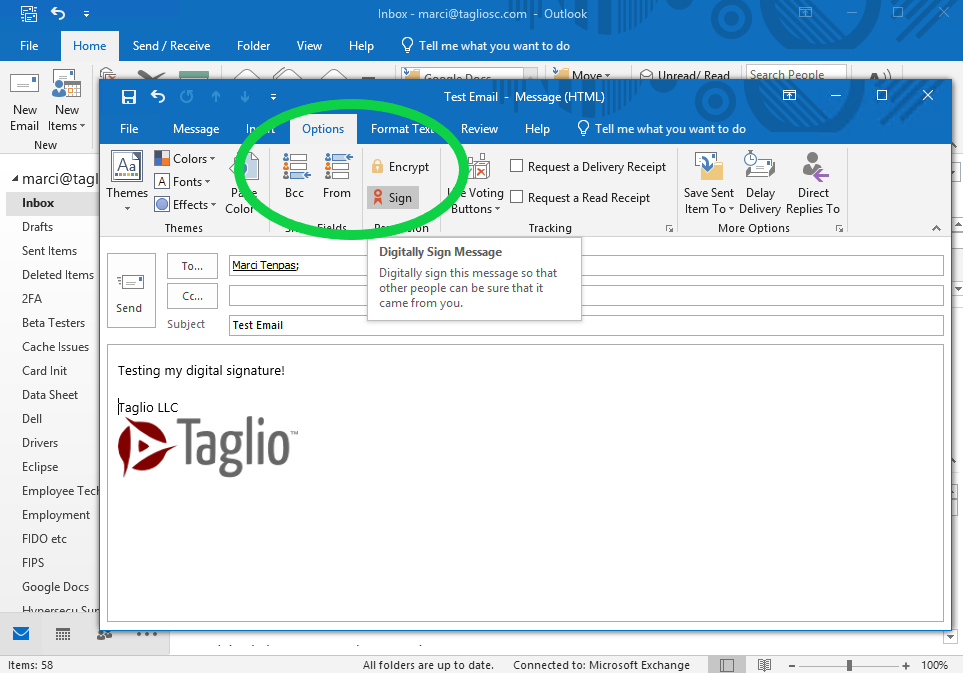
Choose New Email and compose a message as usual. If the option "Add digital signature to outgoing messages" was checked during the Outlook setup, click Send, and Outlook will add the signature automatically.
If the option "Add digital signature to outgoing messages" was left empty, the message will need to be signed. To do so, choose Options and then select Sign. Then click Send.
If it is the first time the Signing Certificate is used, the user PIN must be entered. In this example, the Signing Certificate is mapped to PIV slot 9A for Authentication. Subsequent signed emails will not prompt for the user PIN during the same Outlook session.
If the Signing Certificate were mapped to the PIV slot 9C for Digital Signature, every time an email is signed, the user PIN would be required, providing more security. However, the PIV slot 9C is the only PIV slot that cannot be used for Windows logon. Thus a user could have two certificates on their PIVKey, one used for logon and one for email signing. In that case, a good idea might be to use the Smart Card Logon certificate template for a logon certificate (mapped to the 9A, 9D or 9E slot), and the Smart Card User certificate template for email signing, mapped to the 9C slot.
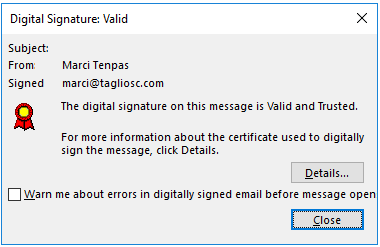
When the email is received and opened, the Signature icon can be seen on the right side of the message.
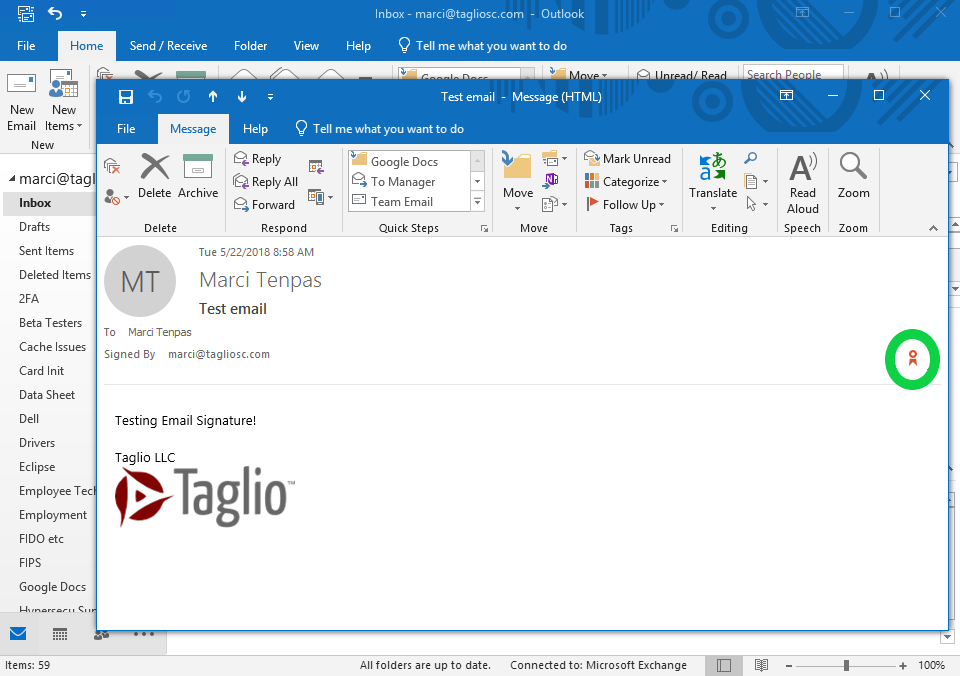
Click on the icon to see more information about the signature.
Comments
0 comments
Article is closed for comments.