
Microsoft Certificate Authority (CA) provides basic smart card certificate templates. However, these standard Microsoft CA templates cannot be used as they are on Windows 2008 servers. They must be duplicated and configured first. This section shows how you can set up two Smart Card certificate templates, one that can be used to self enroll, and one that can be used to enroll certificates on a smart card on behalf of a user.
First, open up the Service Manager. Note: You cannot manage certificate templates from the default CA snap in.
Select “Active Directory Certificate Services”, Certificate Templates, right click the “Smart Card User” template and select “Duplicate Template”

The Smart Card User template is a general use template that enables computer logon, as well as signing and encryption. If you want just smart card logon, you can also select the “Smart Card Logon” template.

Select “Windows Server 2003 Enterprise”.
Note: Do not choose Windows Server 2008 Enterprise – this uses CNG (the new cryptographic subsystem) which does not support the typical smart card.
Rename the template.

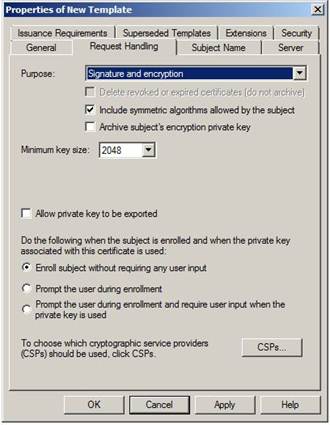
Select the CSPs button at the bottom right of the “Request Handling” tab, and set the template to require the use of the Microsoft Smart Card base Crypto provider. This will ensure that the smart card is used for storing the certificate and keys.

Click OK, and OK again to save the template.
Note: If you will be using the standard Windows PIV minidriver, or any other middleware that supports PIV cards, (Option 2 for deployment from article PIVKey Deployment Overview), you must map the PIV certificates. This can be done using the PIVKey Tool or it can be done in the templates. To do so in the templates, please see article Mapping a PIV Certificate using an OID, which explains how to set it up in the Extensions tab.
Go to the CA snap-in, and select the “Certificate Templates” directory. This directory contains all the templates assigned to the CA. Some templates are assigned to the CA by default.

Select “Certificate Template to issue”.

Select the certificate template you have just created. Check that the certificate template is now visible in the “Certificate Template” directory of the active CA.
You are now ready to have users self-enroll their smart card certificates. See article Self-enrolling a Smart Card Certificate
Comments
0 comments
Article is closed for comments.